For my first "real" blog post, I figured I'd start by showing some of the things I have done in art. I only have two for now. Even if I was to put it all in one post, I'd feel like that'd make the post too long. Also, don't mind the huge scans, as I shouldn't mess with the DPI of our scanner.
A word on the scans, as well. The scanner doesn't scan the pages from the sketchbook very well, the reason being that the page doesn't get as close as it can to the glass. The scanner also gives the pencil and whole page a yellowish tint, meaning that I have to convert it to grayscale in Paint.NET. I don't know why, but I feel this information is necessary.
A word on the scans, as well. The scanner doesn't scan the pages from the sketchbook very well, the reason being that the page doesn't get as close as it can to the glass. The scanner also gives the pencil and whole page a yellowish tint, meaning that I have to convert it to grayscale in Paint.NET. I don't know why, but I feel this information is necessary.
The first two pictures I am going to show you are my first drawing in my sketchbook, and my first major project of the quarter, respectively.

This sketch begins the beginning of my sketchbook. My art teacher gave us a picture, not unlike the recreation attempt you see here, to try and recreate. A piece of advice he gave us is to start small with a little thumbnail before making a bigger, final version, as well as to always start with the outline. He said that you should always finish the basic shapes before shading and details. The latter is sort of a given for most people, but a reminder is always nice.
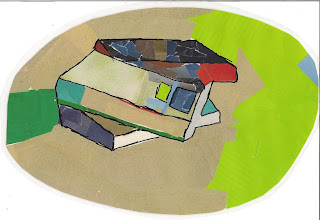
The advice of starting with thumbnails and with the outline before shading and fine-tuning led up to the first project of the quarter. What we did here is found a painting we liked and e-mail it to our teacher. I chose this one. He then printed it out in grayscale, and it was our job to draw out the outline of it. Then, we traced what we had done with tracing paper, put graphite on the other sides, and then traced it back onto a clean sheet of paper. We then proceeded to match the shade of the original grayscale picture with colored paper cut out from magazines. After we had done this, we cut out the paper (we had done all this in our sketchbooks) and laminated it. The final step was to outline the major boundaries with a sharpie. All that is what went into the final piece, which is the picture you see above. To be honest, I am not sure what the point of all that was, or what it accomplished, but it was still a fun project.
That's all for this post. I'll do my sketchbook page by page in future blog posts, each one containing about two to three pages, and include a breakdown of what I was suppose to learn from drawing it, the techniques behind it that he wanted us to practice, and what ever other information about it that is important. I'll probably post the next part tomorrow afternoon.

Good job Jacob!! I'm proud of you.
ReplyDeleteThanks, Mr. Ryker. I found making this pretty fun, so I will most definitely continue this throughout the year.
ReplyDelete